Posts tagged #dessert

Lekker: Maple Bourbon Pumpkin Cake

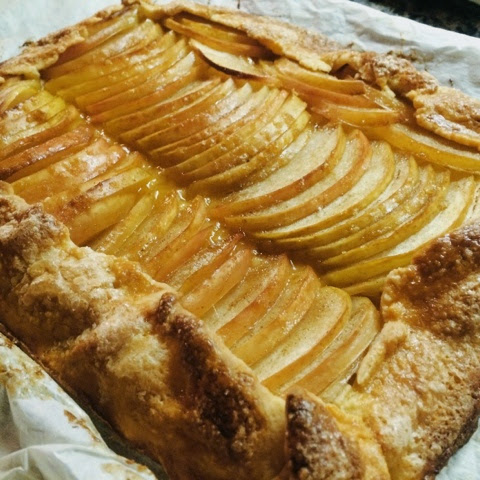
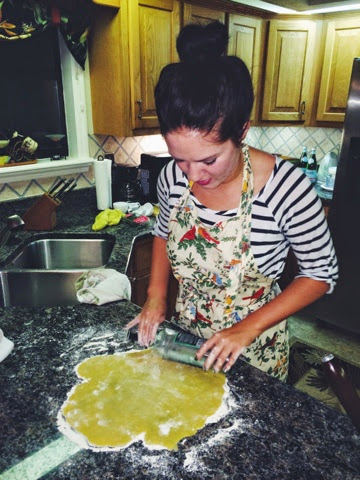
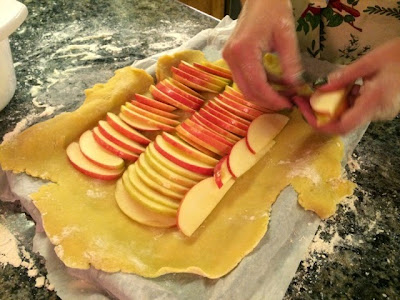
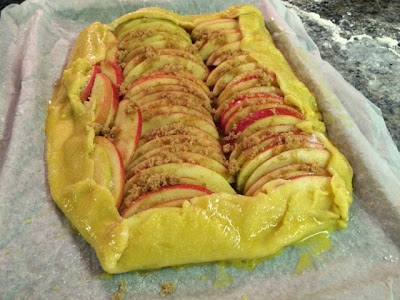
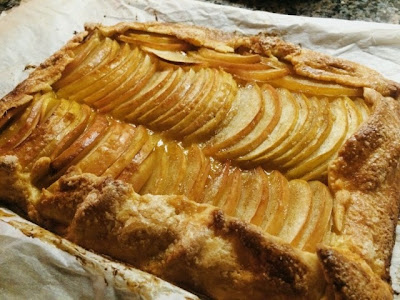
My last blog post was about the amazingly simple Salted Butter Apple Galette, which I love as an alternative to pie because I hate pie. SUE ME. In that pies are traditional for Thanksgiving dessert and my hatred of them does not take holidays, I opted to make this Maple Bourbon Pumpkin Cake.

I chose this because

1. bourbon and
2. because I didn't want a painfully sweet saccharine dessert.

This cake strikes the perfect balance between sweet (the glaze and the maple candied pecans) and boozy-spiced-fall-ness, and was a hit at my table. Try with vanilla ice cream.

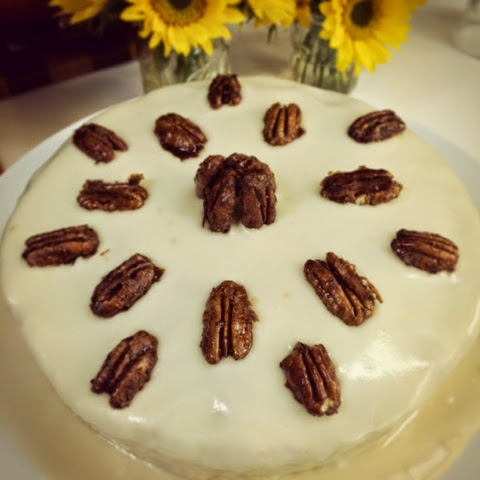
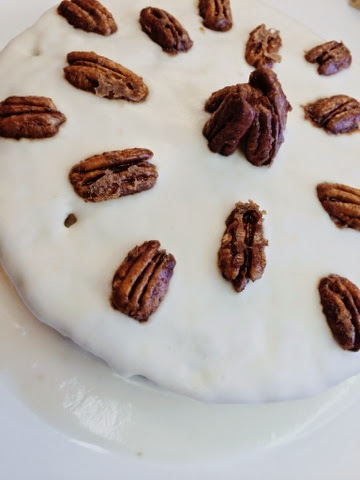
I like to envision this method of decorating as all the pecans coming to worship at the pecan Altar of Candied Wonder in the middle.

It doesn't really matter which bourbon you decide to use. Maker's Mark is my do-or-die favourite, but I am poor now and cannot afford that so I was good ol' Jack for me. Most of it bakes off though, so honestly it doesn't make any difference.

So, let's get baking!

MAPLE BOURBON PUMPKIN CAKE
serves 8

WHAT YOU NEED

For the cake:

  • 2 3/4 cups all purpose flour
  • 1 T baking powder
  • 1 t pumpkin pie spice
  • 3/4 t salt
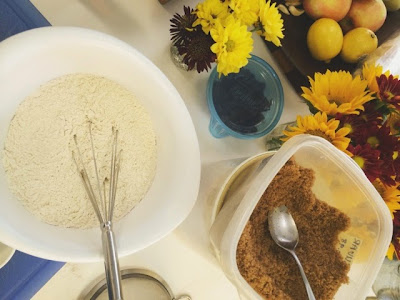
  • 1 1/2 cups firmly packed dark brown sugar
  • 1/3 cup unsalted butter, room temperature
  • 2 eggs
  • 1 t vanilla extract
  • 1 cup cooked pumpkin (Use the tinned stuff like I did, since I had leftovers from making one of my all-time favourites: Pumpkin Soup.)
  • 3/4 cup whole milk
  • 1/3 cup bourbon of your choice

For the glaze:

  • 2 cups confectioner's sugar, sifted after measuring
  • 2 T half-and-half
  • 1 T melted unsalted butter
  • 1 1/2 T bourbon
  • 1 t vanilla extract

For the maple glazed pecans:
Shocking that you would need pecans and maple syrup, right?

  • 1/2 cup pecan halves
  • 2 T pure maple syrup
  • 1/2 t cinnamon


WHAT YOU DO

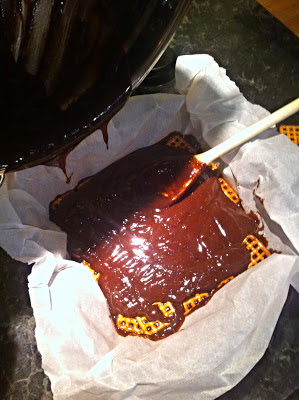
1.  First things first, in a small bowl mix together the pecans, maple syrup, and cinnamon really well. These babies are gonna soak in that goodness while you're mixing up the cake. Give it a stir every once in awhile to make sure the syrup gets into allllll the nooks & crannies.

2. Preheat your oven to 350 degrees F and grease two 8-inch round cake pans. (I suppose this cake could also be done in a Bundt pan or some other loaf pan, or as cupcakes, but I don't know the cooking times and what have you for that.)

In a medium sized mixing bowl whisk together the flour, baking powder, pumpkin pie spice, and salt. Whisk it well, since I'm saving you the hassle of actually sifting that flour separately to aerate it!

3. In another larger mixing bowl, beat the butter with an electric mixer until light yellow and fluffy. Add the brown sugar, and beat again until light and fluffy. Add the eggs and mix well. See: light and fluffy. (Get the picture?) Then add your pumpkin and vanilla. It might look a little grainy and weird after you add the pumpkin, but don't try to overbeat it just to get rid of that. It's fine.

4. With your mixer on low, add half the flour mixture to the wet batter. Mix well. Add the milk, and mix well. Add the other half of the flour, and ___ ____. Finally, dump in the bourbon and mix well-ish.

5. Pour the batter evenly into your pans, and bake at 350 for about 20-ish minutes or until a toothpick inserted in the center comes out clean. Remove the pans and set on top of wire cooling racks for about 10 minutes (this gives the cake time to contract from the sides of the pan) and then flip out onto the racks to finish cooling.

6. *While* those babies are cooling, and your oven is still at 350, it's time to do the pecans! Line a baking sheet with parchment paper, and dump your maple coated pecans on there. Bake for 5 minutes, then remove and toss, and bake for 5 minutes more. That's all it should take for them to go all nicely dark brown and smell amazing. Feel free to taste test one.

7. Since that only took 10 minutes and your cakes are probably still cooling, you can mix up your glaze now and give it time to set up.

Tangent: I have a love-hate relationship with glazes. They are easy because they literally involve just dumping everything together and stirring until smooth (so...do that), BUT. Since glazes have a more liquid consistency than frosting, you kind of just dribble it down over the top of the cake and hope that it will come dripping down the sides attractively. But if you want those attractive little drips, then you can't pour too much glaze on...WHICH MEANS THERE ISN'T ENOUGH GLAZEY GOODNESS ON THE DAMN CAKE! And I won't stand for that.

So what you should do is schmear a decent amount on the inside of your two 8-inch layers as a filling, and *then* content yourself with dribbling the glaze over the top. If you want to put something else or nothing at all in the middle, then here's what I suggest: do one layer of slow glaze dribbling. Stop. Leave it alone for about 15 minutes, giving it time to set up. Then come back and do a second layer. It still won't give you a ton of glaze on the sides, but there's more on the top and whatever, I suppose that works.

8. I honestly don't even remember where we were now. Oh right, okay so you made the glaze. Once the cakes are cool, stack them on a cake plate and glaze accordingly as discussed/ranted about above. Decorate with the pecans as you wish. Done!

It would have been nice if I had remembered to take a photo of the *inside* once we had cut a slice, but no. Of course not. FOR THE RECORD, though, it's a lovely dusty dark orange.

Recipe originally inspired by this one by Bakerella.

Lekker: Salted Butter Apple Galette

It's here, it's here, it's finally here!!! Happy Thanksgiving guys!

I can't wait to share with you some of the things I'm making for today, after they are taste tested by my highly qualified tasting panel (hah). On the menu is a Lemon Sage Butter Roasted Turkey with white wine gravy; my classic Perfect Mashed Potatoes; Sourdough, Italian Sausage, and Roasted Chestnut Stuffing; and a luxury Green Bean & Mushroom Casserole. I'm not a fan of dessert pies, generally, and so for dessert I opted for a Maple Bourbon Pumpkin Cake.

If you find it utterly sacrilegious not to serve apple pie for Thanksgiving dessert though, may I propose this delicious and simple Salted Butter Apple Galette as an updated alternative?

Isn't it beautiful?! And so deceptively simple, too. The ingredient list is short, and you just might already have everything you need around the house. It never hurts to have a back up just in *case* one of your preplanned desserts doesn't entirely work out.

This recipe is straight from the hallowed halls of Bon Appetit Magazine, with whom I enjoy the most majestic of love affairs, so I'm just going to link to it right here.

The only changes I made were to use a teaspoon of vanilla extract instead of bothering with vanilla beans. Don't be intimidated by the apple slices! If you have a mandolin of course you can use one, but I just sliced neatly with a steady hand. The tart dough is easy to whip up too, just make sure you have some time for it to chill in the fridge. Onward!

Ah, look! Proof, that I do, actually, do all this cooking! And yes, I am using an empty wine bottle as a rolling pin, because why not?

It should look like this right before you pop it into the oven. Num num num,

And...fin!

Liquor: The Dirty Drunk Girl Scout

I'm not exactly sure what to call this drink. Most of you will recognise it as the Dirty Girl Scout, but that involves Creme de Menthe and Bailey's Irish Cream, neither of which I happened to have on Sunday. What's a girl to do when she's determined to drink her dessert? Improvise! (Drunkenness is the mother of invention, right? That's how the saying goes?) That's why THIS little recipe calls for similar but different ingredients and I get to switch up the title. Figures that it becomes even more inappropriate that way, but whatever.

Beware: this drink is SWEET, much sweeter than I will ever be. These days I just want my Maker's Mark on the rocks, but when you're craving dessert and are fresh out of Thin Mints or anything else that's minty and chocolately and indulgent and delicious...well, this kind of thing happens. Join me, ladies. Your PMS will thank me later.

It's almost like a grown up milkshake? That's awesome. If you want to be fancy you can garnish with a sprig of mint, which I also, sadly, did not have on hand. Foodie problems yo.

What You Need
makes 1 cocktail

2 ounces vodka
1.5 ounces white chocolate liqueur  (I used Godiva)
1 ounce peppermint schnapps (I used what I had leftover from Christmas, but I was told by my buddy Monkey Boy to definitely try it with Rumple Minze next time for an extra kick. Meow.)
1 ounce Kahlua

What You Do

1. Easy, peasy, pudding & pie. Shake all in a cocktail shaker over ice for 30 seconds and serve, again over ice. Garnish with fresh mint if you wish, or a cookie on the side if you are REALLY suffering.


You may notice that's not your average ice cube floating there. In fact, a few weeks ago the folks over at Arctic Chill asked me if they could send me some free stuff to test , and of course the only sane answer to that question is "HELL YES!" They sent me a four-pack of these badass Ice Ball Makers and I've been messing around with them ever since. They're round, BPA-free (or so they say; I couldn't find mention of this anywhere on the box...something to think about, Arctic Chill!) silicon moulds that look like this:

 
All you do is connect the two pieces together and fill with water. Water expands as it freezes, of course, so the two pieces separate a bit but nothing crazy, and out easily pops an ice ball like this:


They melt so much slower than regular ice cubes, making them perfect for drinks on the rocks (my roommate Bear raves over these for his whiskey on the rocks) or drinks you want to keep cold without diluting terribly, just like the Dirty Girl Scout. No one likes watery cream drinks. At $20 for a 4-pack from Amazon I think they're definitely a worthy investment for your liquor cabinet. I'm going to be experimenting with them in the spring, filling them with water that's been boiled and cooled to yield a clear ice ball instead of a murky one, and possibly studding them with frozen fruit or edible flowers. You know, girly shit.

Cheers!

Lekker: Grilled Bananas with Chocolate & Peanut Butter Sauce

I am not a HUGE dessert person. I used to be, used to have a huge sweet tooth just like my Dad for cake, brownies, cookies, the works. I *had* to have a bite of something sweet after dinner. I'm not sure if I've grown out of it as my taste buds have matured, or if I simply have more control over myself (that'd be a first) or if I just subconsciously make up for lost time when I'm PMSing (likeliest scenario.) However, there's just something about the classic flavour combination of bananas and chocolate I've always loved, and in my "younger years" that meant spooning Nutella on top of a banana and calling it dessert. I'm certainly not above that now, but I desperately try to keep Nutella out of the house so that when I DO succumb to a chocolate craving, it's not half-a-jar's worth via spoon, in classic white girl style.

Too bad I discovered chocolate sauce on my most recent "cravings hunt" through the pantry.  DAMMIT! Curse you, PMS.

Since I am participating in this societal farce of pretending to be an actual sophisticated grown up, I decided to put a minute bit of effort into making my dessert this night. I think it took me all of 7 minutes to put together, and the simple act of grilling the bananas and whipping up an easy peanut butter sauce elevated these humble ingredients to something I would totally serve to guests. Have you ever smelled a grilled banana? It's incredible. The natural sugars in the fruit become carmelised over the high heat and become so sweet and delicious I could happily eat them plain--did, often, as a child, though sometimes with some brown sugar sprinkled o'er top--but given my aforementioned "condition"...these were doused in chocolate.


Grilled Bananas with Chocolate & Peanut Butter Sauce

What You Need
It's easy to duplicate this recipe for multiple people if you use your head; I've written it as if you are #foreveralone/saucily-single-by-choice (however you'd like to rationalise *that* on any given day) like me, and/or just extremely selfish over your dessert...also like me.

1 banana
A small schmear of butter, salted or unsalted, whatever spread you normally use (I use Earth Balance, which I am batshit crazy about because it's the best non-dairy spread I've ever tried that is not full of scientific synthetic garbage...but that is the topic for a different rant-y blog post)
1 T creamy peanut butter
~1/2 tablespoon milk, cream, or half-and-half, whatever you have on hand, hell I don't care if you use coffee creamer
1 T chocolate syrup (HAHAHA let's be real here, if you're PMSing you know it's going to be more)

What You Do
1. Ready? Okidoke, so if you're like me and it's about as cold as my bitter frozen heart outside (that's 30 degrees, to be exact) there's no grilling going on because you're not insane. Instead, you have a grill pan inside, (which everyone should have, they are awesome!) usually a cast iron skillet with little grill-like thingies on the bottom. I don't know the technical term for it. "Grill ridges"? Just look at the picture in a second! Heat that sucker up over medium high heat.

2. Slice your banana down the middle, lengthwise, leaving the peel on. Butter the cut sides a bit. Press them facedown onto the hot grill pan and let them sizzle for a few minutes.


3. Meanwhile, in a teeny bowl whisk together the peanut butter and whatever dairy mixer you chose to make a sauce. Adjust the amount of dairy depending on how thick or thin you want your sauce to be. This is totally your show. It's nice to be in control of things, isn't it?

4. Rotate the bananas a bit so you can get some appeeling (hahahaha) alternating grill marks on the bananas for a few more minutes.


When they're ready, flip them over and grill peel side DOWN for just about a minute. Transfer to a plate and drizzle your peanut butter sauce and chocolate sauce all over, and CHOW DOWN on those bad boys.

Then, if you're like me, immediately get up and make another serving.

Lekker: Salted Caramel Pretzel Brownies

I celebrated my 23rd birthday on Thursday September 5th (yay for Virgos!) so it's been a bit of a whirlwind this week. No time to cook! (But I do have some cold-brined pickles that are busy...pickling...in the fridge that I'll write about once I can taste them.)

I always make a dessert to bring to work for my birthday, because, well, it's an excuse for cake! EXCEPT. Last year I was equal parts laughably unprepared and ridiculously over-ambitious to attempt the four layer rainbow cake that I had in mind.

It was OK for a second:


But with no support between the layers, it took about 5 seconds for THIS to happen:


HAH! Fail. And so, the sad cake lived out the rest of its short life in multiple Pyrex containers.

It's not that I can't bake cakes; in fact I've had way more successful cakes than unsuccessful ones so I can't really tell you what I was thinking with this. Drunk, maybe. Good possibility, actually.

(Sidebar: My 19-year-old brother says that "baking cakes" is the term the young people are using to mean "talking" now. Like, you're not actually exclusively dating someone yet but you're not just friends, you're "baking cakes". Is that really a thing? What is it called when you actually start dating? "Roasting chickens"? I am only 23 and now I feel 80. Thank you, Ry.)

Anyway, so this year I decided to do something a little different and stumbled across the idea of Salted Caramel Pretzel Brownies on Pinterest. The concept sounded magical to me, combining salty and sweet with fudgy chocolatey goodness. Yes please! Only problem was, the instructions sucked and most commentators couldn't stop moaning about all the problems they were having. So I decided to wing it and figure it out myself, so here we go!

It doesn't really look like the pretzels are there, but they are, I promise!

Salted Caramel Pretzel Brownies
makes about 12 pieces, depending on how big you cut them; they're pretty rich, unlike me

What You Need
1 box "Family Size 13 x 9" fudgy brownie mix (I used Betty Crocker) plus the ingredients to make them according to box directions
1 bag pretzels (I used the square waffle-type ones because I figured they would be easier for cutting and I'm pretty sure I'm right)
2 5.5 ounce bags of Werther's Creamy Caramels 
1 tablespoon half-and-half
Sea salt

What You Do
1. Preheat the oven to the temperature indicated on the box of brownie mix. Prepare the brownies according to directions. Line a square 8 x 8 or 9 x 9 pan with parchment paper; or, alternatively, you could try simply greasing it well. I opted for parchment paper so I could lift the brownies out of the pan for easier cutting, but it's up to you, I don't think it's a train smash either way.

2. Pour about half of the brownie mix into the bottom of the pan. Then gently place a layer of pretzels on top of that batter. Now do another layer. (The pretzels will get sort of soft during the baking process so it's not like you're chomping straight into a hard, totally crunchy pretzel in the middle of a soft brownie.) Gently pour the rest of the brownie batter on top of the pretzels, smooth it out nicely and toss it in the oven. Follow the baking times listed on the box for your pan size.


3. While those are baking you can start making your caramel sauce. Unwrap all of those individual caramels and throw them in a small pot with the half and half. Over the LOWEST temperature possible, allow them to melt slowly, stirring with a wooden spoon.

 This is about halfway through the melting process. Keep stirring as much as possible to keep the heat even and prevent burning.

You can adjust the amount of half-and-half if it's too thick; you want the consistency to be pourable from the pot but not too runny.

Like this.

4. When the brownies are done, allow them to cool for about 20 minutes before you pour the caramel over top. Wait about a minute or two for the caramel to set (you can wash the caramel pot at this point; TRUST ME you do not want to let it set in the pot or you will absolutely hate your life and everyone in it who allowed you to get to that point of prying enamel/caramel off a pot with a butter knife and possibly stabbing yourself in the process--NOT that I'm speaking from experience...) and then sprinkle the sea salt over top, pressing it down a bit into the caramel. Isn't it so pretty, sparkling on there?! I loved it.

Well you can't really see the sparkling, but it's there!

5. All done! Once it's completely cool you can slice and dice to your heart's content. Run your knife under hot water before you make the slices; it'll help to get through the caramel a bit easier. I could totally see these being served with some vanilla ice cream. They were a hit at the office and successfully glued SOME PEOPLE'S jaws shut, which was a nice change. (Kidding, kidding.)

22 was without a doubt the best year of my life thus far, and my life is generally pretty awesome so that was actually a hard call to make. But it's true, and I can't wait to see what 23 will bring.

Cheers, darlings!